 Guide
GuideHow to Build a Gundam Diorama on a Budget
The first time I set a kit on a plain plastic stand next to a bookshelf, it looked fine. The first time I set that same kit into a scrap of cracked earth with a scorched panel and a bent antenna nearby, it looked like a scene. That jump from figure to scene is what a diorama gives you, and it costs a lot less than people assume.
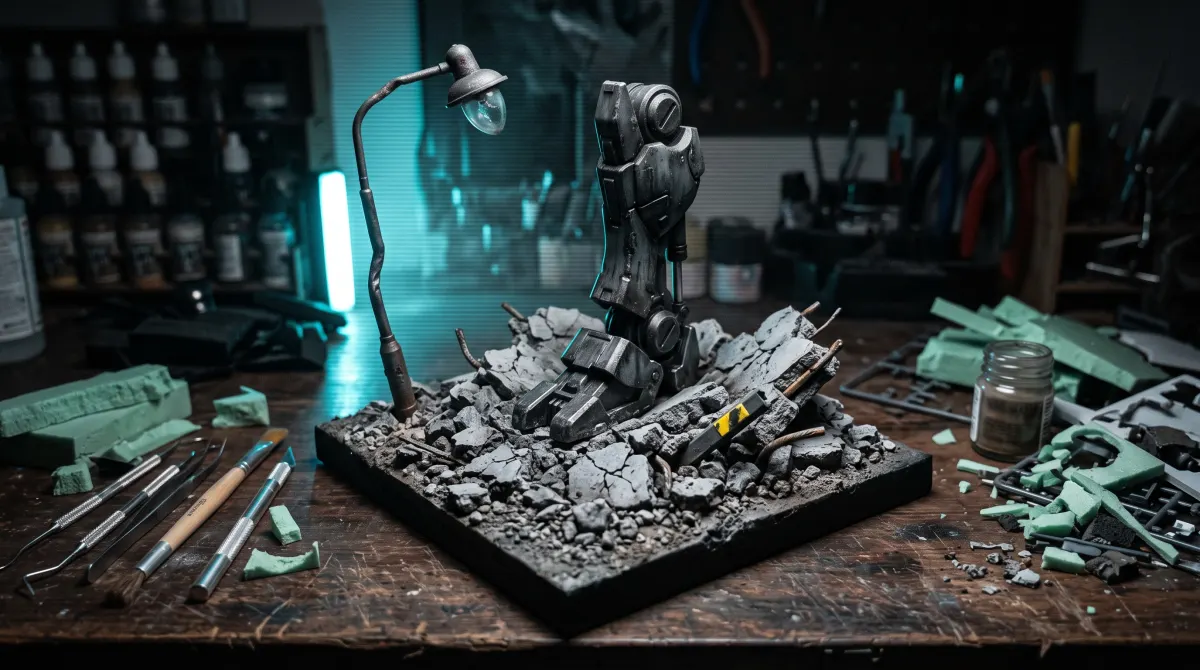
This is a foundational build, not a showcase piece. I am going to walk through a base you can finish in an afternoon or two using foam, filler, and craft paint, plus how to pose the kit so it reads as a moment instead of a toy on a shelf. Nothing here requires an airbrush, a compressor, or resin casting.
If you already know your grades and have a kit picked out, skip ahead to the base section. If you are still deciding what to build first, it is worth reading a grades primer before you commit glue to foam.
Pick a scene before you pick materials
Decide what is actually happening in the diorama before you cut anything. A kit standing on flat ground is not a scene. A kit with one foot planted on a crumbled slab, weight shifted, weapon raised toward something off the edge of the base, is a scene. I sketch this on paper first, even badly, because it tells me how big the base needs to be and where the highest point of the terrain should sit relative to the kit's head.
Keep the first one small. A 15cm or 20cm square base is enough room for a single 1/144 kit with some rubble and a slope, and a small base forgives mistakes far more than a large one does. You can always build a bigger diorama once you know how your filler and paint behave.
Build the terrain structure with foam
Extruded polystyrene insulation foam, the pink or blue rigid board sold at hardware stores for home insulation, is the standard budget core for diorama terrain. It carves easily with a hobby knife or a box cutter, it is light, and a full board costs a fraction of what a hobby-brand terrain kit runs. Cut it down to rough blocks and stack or glue them to build up hills, craters, or broken ground.
Use PVA (white) glue or an epoxy to join foam pieces. Avoid CA glue and most spray adhesives directly on the foam, they can melt or eat into it. Carve the rough shape first with a knife, then go back over it with coarse sandpaper or a wire brush to knock down hard edges. You are not trying to get the final texture here, just the underlying shape.
Add texture with cheap filler
Once the foam shape is carved, cover it with a thin layer of lightweight spackle, joint compound, or air-dry paper clay. All three are available at any hardware or craft store for a few dollars and they take texture well while wet. Press in the tip of an old brush, a sponge, or even a crumpled piece of foil to raise rock texture, and drag a toothpick or sculpting tool through it to cut cracks and panel-like seams into ground plates.
Let it dry fully before touching it again, usually overnight for anything thicker than a couple millimeters. If you want a scorched or war-torn look, this is also the stage to press in small chunks of leftover plastic runners or kit sprue as scattered debris before the filler sets, so they sit embedded in the ground rather than glued on top later.
Paint the base in cheap layers
You do not need an airbrush for terrain. A basecoat of craft acrylic in a dark brown or grey, brushed on straight from the bottle, covers the dried filler and seals it. Once that is dry, a dry-brush pass in a lighter grey or tan across the raised texture will pop the highlights immediately, dry-brushing is one of the most forgiving techniques in the hobby because mistakes just blend into the next pass.
For scorch marks or grime, thin some black or dark brown paint heavily with water and let it pool into the cracks and low points, then wipe the raised areas clean with a cloth before it fully dries. This is a cheap version of a wash and it does most of the work of making flat filler look like real weathered ground.
Add static grass and small details
Static grass and flock, sold cheaply in small tubs at hobby shops and hobby train sections of craft stores, adds a huge amount of realism for very little cost. Brush a small patch of PVA glue where you want growth, sprinkle the flock on, tap off the excess, and let it dry. A pinch of static grass applied with a static applicator (or just tapped on by hand in small patches) stands up and reads as grass instead of a flat green dusting.
Small debris sells the scene too: broken sprue chunks, a bent piece of photo-etch or foil, a scattering of fine sand in a blast radius. Keep debris logically placed, near the point of impact or damage in your scene, rather than scattered evenly across the whole base.
Pose the kit so it reads as a moment
A diorama lives or dies on the pose. Bend the knees slightly even in a standing pose, shift weight onto one leg, and angle the head and torso away from a straight forward-facing line. Most HG and RG kits have enough hip, knee, and ankle articulation to plant one foot on an angled or raised piece of terrain if you test the joint range before committing to glue.
If the kit will not hold a lean or a mid-air pose on its own, a length of thin wire (florist wire or brass rod from a craft store) run up through a drilled backpack or leg joint and anchored into the base gives you support without a visible stand. Test the full pose dry-fit on the finished base before you glue any feet down, it is much easier to redrill a foot peg hole now than after the model is fixed in place.
A convincing Gunpla diorama comes from cheap insulation foam, a few dollars of filler and craft paint, and a pose that commits to one clear moment, not from expensive tools.
Common questions
Do I need an airbrush to build a good diorama base?
No. Craft acrylics applied by brush, dry-brushing for highlights, and a thinned wash for grime will get a small terrain base looking convincing. An airbrush speeds up large smooth gradients but is not required for rock, dirt, or rubble textures.
What foam should I use for the diorama base?
Extruded polystyrene insulation board (the rigid pink or blue foam sold for home insulation) is the standard cheap option. It carves cleanly with a hobby knife and holds shape better than foam core board, which is really meant for flat scratch-building panels, not carved terrain.
How do I keep my kit from falling off an angled base?
Drill a small hole through a foot peg or ankle joint and run a length of thin wire or brass rod down into a matching hole in the terrain, hidden by texture or debris around the foot. Always dry-fit the pose before gluing anything down.
Should I paint the kit before or after building the base?
Build and paint the base first, or at least get it to a stable dry-fit stage, since you will want to test the pose against the terrain repeatedly. Final panel lining and top coat on the kit itself are usually best done after you have confirmed the pose fits.