 Guide
GuideHow to Build Your First Gunpla, Step by Step
The box makes it look simple, and honestly, it mostly is. Gunpla kits are engineered so well that a beginner with patience and the right cutting tool can end up with something that looks genuinely good on a shelf.
What trips people up isn't difficulty, it's not knowing the small habits that separate a clean build from one covered in white stress marks and stray nub stubs. I've built plenty of kits badly before I built them well, and almost every mistake traces back to skipping one of the steps below.
This is the order I'd walk a first-timer through, from clearing the desk to deciding whether to bother with panel lining. None of it requires paint or an airbrush. It just requires slowing down.
Set up a workspace before you open the box
You need less than you think: a flat table, decent light, a cutting mat or an old placemat so parts don't skitter across the floor, and a small container or tray for loose pieces. Runners (the plastic frames holding all the parts) are easy to knock off a table, and hunting for a 3mm joint on carpet is nobody's idea of fun.
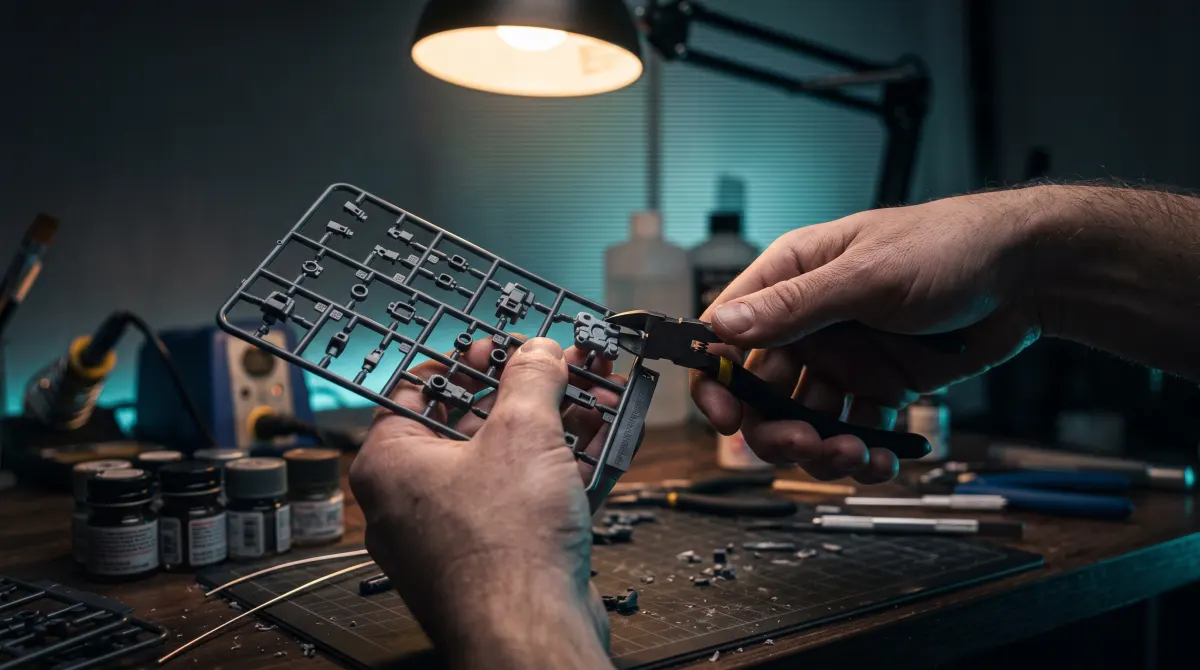
Don't punch parts out with your fingers. It seems harmless on a big flat piece, but it stresses the plastic where it connects to the runner and can leave a whitish crack or tear a chunk out of the part itself. That single habit is behind more ruined first builds than any actual assembly mistake.
Read the manual like it's the actual project, not a suggestion
Bandai manuals lean almost entirely on diagrams and a small set of symbols rather than written text, which is why Gunpla travels so well internationally. Every part is labeled with a letter for its runner and a number for its position, so A-15 means runner A, part 15. The parts map near the front of the manual shows you exactly what's on each runner before you cut anything.
Follow the step order even when it seems like you could skip ahead. Kits are designed with internal frames and joints that need to go in before the outer armor closes over them, and building out of sequence is the fastest way to end up stuck holding a part that no longer has anywhere to go.
Clip and clean nubs the right way
Side cutters (nippers) are the one tool I'd call non-negotiable, and cheap hardware store diagonal cutters are not the same thing. Gunpla nippers have a flat face on one side of the blade that lets you cut close to the part without crushing it, and they cost less than a kit does.
The two-stage cut is worth learning early. Cut about a millimeter or two away from the part first, leaving a small nub behind, then come back and trim that nub down flush with the flat side of the blade against the part. Cutting flush in one pass on a tight curve is how you get the stress-whitened marks and little gouges that show up under any decent light. A hobby knife or a sanding stick can clean up whatever the nippers leave behind, but on most kits the two-stage cut alone gets you most of the way there.
Only cut what the current step needs
It's tempting to strip a whole runner at once so you're not flipping back and forth, but cutting parts as the manual calls for them means you always know exactly what's in your hand. Loose parts from different runners look more alike than you'd expect, especially small joints and connector pegs, and mixing them up mid-build is a common source of frustration.
Keep the runners in their bags or grouped by letter until you actually need them. It's a small habit but it keeps the desk manageable on a kit with a dozen or more runners.
Decals, stickers, and how much to bother with them
Most kits include a sheet of stickers plus, depending on the grade, a sheet of waterslide or dry-transfer decals for finer details like camera lenses and hazard stripes. Stickers are the fast option and completely fine for a first build. Apply them with a toothpick or the tip of a hobby knife rather than your fingers so you don't leave a fingerprint crease across the surface.
Waterslide decals take more patience (soak, slide, position, blot) but sit flatter and read as more finished once a build is done. There's no wrong choice here for a first kit. Get comfortable with the build itself before worrying about decal technique.
Panel lining is optional, and worth trying once
Panel lining means running a thin dark line into the recessed grooves molded into the armor, which adds shadow and depth that flat, unlined plastic doesn't have. A fine-tip panel line marker is the easiest entry point: run it along a groove, let it sit a few seconds, then wipe the excess off the flat surface with a cotton swab dampened in a little rubbing alcohol, leaving the line sitting in the recess.
It's genuinely optional. Plenty of straight builds (no paint, no lining, snapped together exactly per the manual) look great on their own, especially on kits with pre-shaded or multi-color molded plastic. But lining one kit is a quick way to see whether you want to keep leveling up your builds.
What to do when something doesn't fit
If a joint feels unusually tight, don't force it. Check that you cut the connecting peg cleanly and that you haven't got a part turned backward, since a lot of Gunpla joints and panels are handed and only click in one orientation. A little plastic model cement or even firm, steady pressure fixes most of these once you spot the real cause, but cranking harder on a part that's simply oriented wrong is how corners snap off.
A great first Gunpla build comes down to patience with the manual, a proper pair of nippers, and clean nub removal, not skill you don't have yet.
Common questions
Do I need paint for my first Gunpla build?
No. Kits are molded in the colors of the actual robot, so a straight build with no paint still looks accurate and complete. Paint is worth exploring later, not on kit one.
What's the single most important tool for a first build?
A proper pair of Gunpla side cutters. They're inexpensive and make a bigger visible difference than anything else on this list, since clean nub removal is what separates a tidy build from a rough one.
Should a beginner start with a High Grade kit?
Generally yes. HG kits are simpler and cheaper than Master Grade or Perfect Grade, so mistakes cost less and the runner count stays manageable while you're learning the basics.
Is panel lining necessary?
No, it's a finishing touch, not a requirement. Plenty of well-built straight kits skip it entirely and still look sharp on a shelf.